In today's fast-paced and competitive business landscape, the ability to transform ideas into tangible prototypes is crucial for success. According to recent studies, companies that prioritize prototyping during product development are 63% more likely to bring innovative products to market.
This article aims to provide a comprehensive guide on various prototyping techniques, from breadboarding and solderless methods to rapid prototyping through 3D printing and laser cutting.
Additionally, it will explore essential testing equipment, effective debugging techniques, and expert tips for successfully translating ideas into working prototypes.
Key Takeaways
- Prototyping is a crucial step in the product development process, allowing for testing and refinement before full-scale production.
- Breadboarding techniques enable quick testing and iteration, allowing for easy troubleshooting and component selection.
- Solderless prototyping methods like breadboarding, wire wrapping, and connectors offer easy modification and reusability of circuits.
- Rapid prototyping technologies like 3D printing and laser cutting provide speed, flexibility, and cost-effectiveness in producing prototypes.
Understanding the Prototyping Process
Understanding the prototyping process is essential for effectively transforming an idea into a working prototype. Prototyping is a crucial step in product development as it allows designers and engineers to test and refine their concepts before investing significant time and resources into full-scale production. The process typically involves several stages, starting with conceptualization and followed by design, fabrication, testing, and iteration.
Conceptualization involves defining the problem statement, identifying user needs, and brainstorming potential solutions. Once a concept is selected, detailed design work begins using tools like CAD software to create virtual models of the product. Fabrication involves translating the digital design into physical form through various methods such as 3D printing or traditional manufacturing techniques.
Testing is then conducted to evaluate the performance, functionality, and usability of the prototype. This stage often involves gathering feedback from users to identify areas of improvement. Based on these findings, iterations are made to refine the design until a satisfactory solution is achieved.
Exploring Breadboarding Techniques
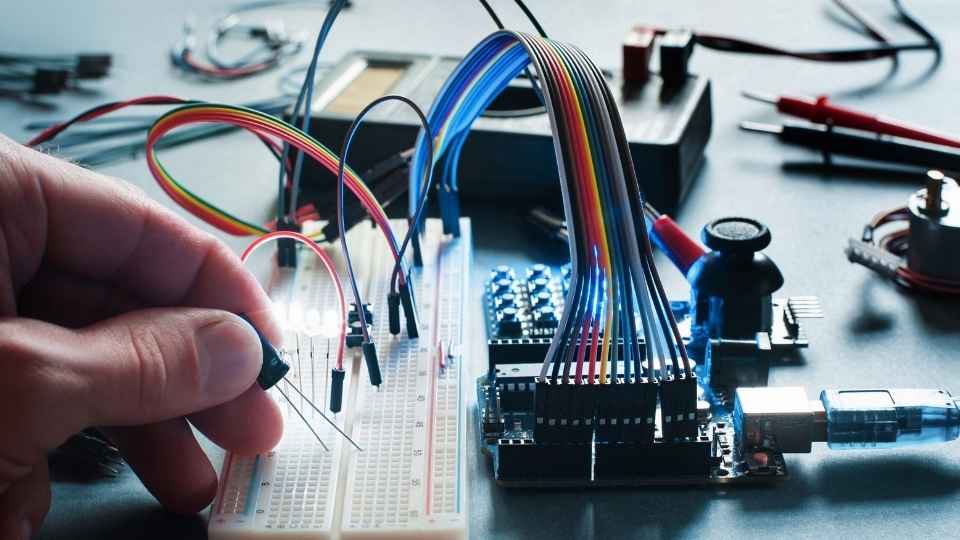
To gain practical experience in the development process, it is crucial to explore various breadboarding techniques that facilitate the transition from concept to a functional model. Breadboarding is a prototyping technique that allows engineers and designers to quickly test and iterate on their ideas before moving forward with more permanent solutions.

Here are three key aspects of breadboarding techniques:
Breadboard layout: A breadboard typically consists of a grid of interconnected holes or slots where electronic components can be plugged in. Understanding how to properly layout and connect components on a breadboard is essential for creating a functional prototype.
Component selection: Choosing the right components for your project is vital. Breadboarding allows you to experiment with different components without soldering them permanently, giving you the freedom to test various options before committing to a final design.
Troubleshooting: Breadboards are an excellent tool for troubleshooting circuitry issues. By having easy access to all connections, you can quickly identify and fix any problems that arise during testing.
Solderless Prototyping Methods: A Comprehensive Guide
A comprehensive guide to solderless prototyping methods provides engineers and designers with a step-by-step approach for quickly testing and iterating on their electronic designs.
Solderless prototyping refers to the process of building circuits without the use of solder, allowing for easy modification and reusability. This method is particularly useful for those who desire freedom in their design process as it enables quick experimentation and iteration.
There are several popular solderless prototyping methods available, including:
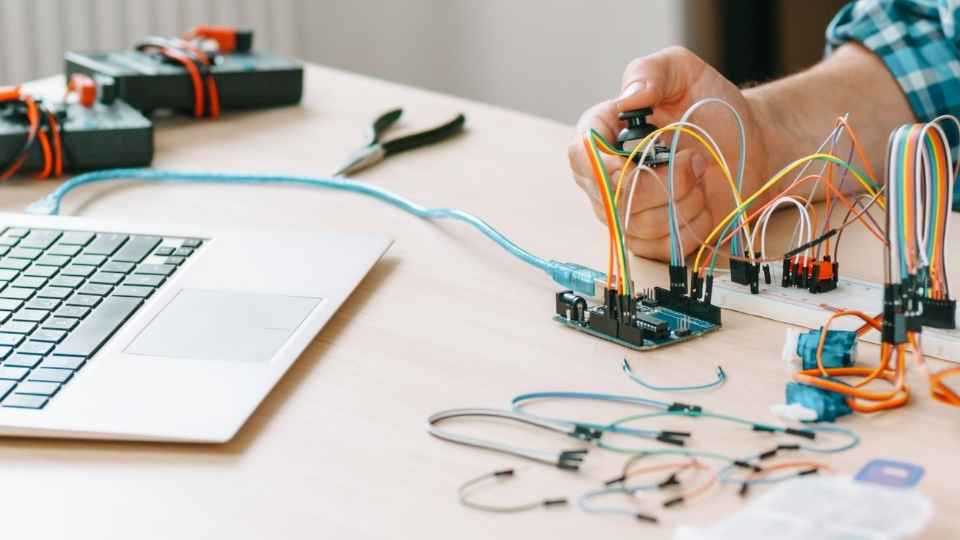
- Breadboarding: involves using a breadboard to create temporary connections between components.
- Wire wrapping: uses a specialized tool to tightly wrap wires around component pins.
- Using connectors such as header pins or terminal blocks.
Each method has its own advantages and considerations, but all provide flexibility in designing and refining electronic prototypes.
Rapid Prototyping Insights: From 3D Printing to Laser Cutting
The use of 3D printing and laser cutting in rapid prototyping has revolutionized the product development process, allowing designers to quickly create physical models and test their ideas for form, fit, and function. These technologies offer numerous benefits that appeal to designers seeking freedom in their creative process:
Speed: With 3D printing and laser cutting, prototypes can be produced within hours or days, significantly reducing development time compared to traditional methods.
Flexibility: These techniques enable designers to easily modify their designs without costly tooling changes or manufacturing delays.
Cost-effectiveness: Rapid prototyping eliminates the need for expensive molds or tooling upfront, making it an affordable option for small-scale production runs or customized parts.
Essential Testing Equipment for Prototyping
When it comes to prototyping, having the right testing equipment is essential for ensuring the functionality and reliability of the product.
Testing equipment such as multimeters, oscilloscopes, and power supplies are crucial for measuring and analyzing various electrical parameters.

Additionally, tools like force gauges, torque meters, and temperature sensors enable engineers to test mechanical properties accurately.
To effectively validate the functionality and performance of a prototype, it is essential to utilize an array of must-have testing tools. These tools are designed to ensure that the prototype meets the desired specifications and performs as expected. Here are three must-have testing tools that every prototyping process should include:
Multimeter: This versatile tool allows you to measure voltage, current, and resistance, making it ideal for troubleshooting electronic circuits and ensuring their proper functioning.
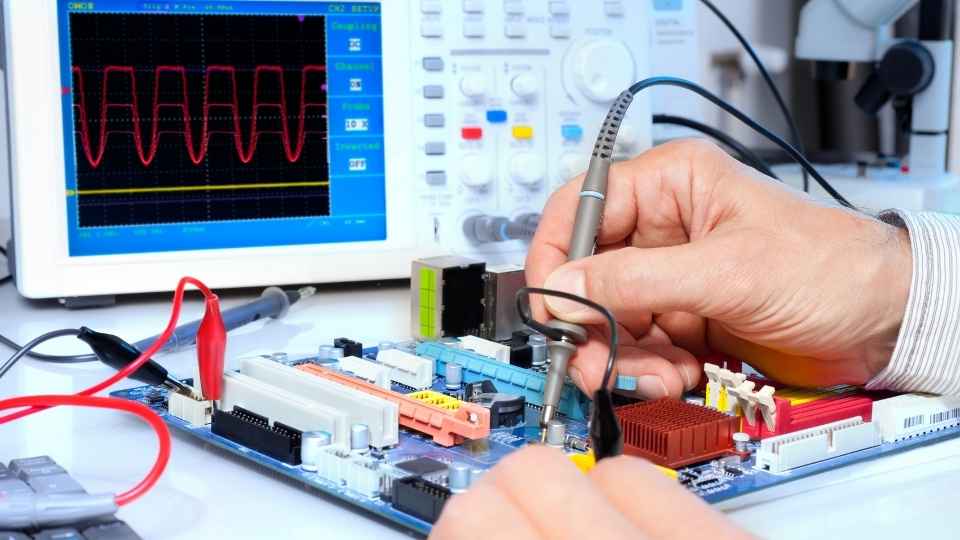
Oscilloscope: An oscilloscope is used to visualize and analyze electrical signals in real-time. It provides valuable insights into waveforms, frequencies, and amplitudes, helping identify any abnormalities or issues.
Logic Analyzer: A logic analyzer is a powerful tool for debugging digital circuits by capturing and analyzing digital signals. It enables you to observe multiple channels simultaneously, making it easier to detect timing violations or communication errors.
Testing Equipment Recommendations?
One essential aspect of the testing process is selecting the right equipment, such as multimeters, oscilloscopes, and logic analyzers. These tools are vital for accurately measuring and analyzing electrical signals in a prototype.
Multimeters are versatile instruments that can measure various quantities like voltage, current, and resistance. They provide a quick snapshot of the electrical conditions within a circuit.
Oscilloscopes, on the other hand, enable engineers to visualize waveforms and analyze their characteristics in detail. This allows for precise analysis of timing relationships and troubleshooting of signal integrity issues.
Logic analyzers are indispensable when working with digital circuits as they capture and display digital signals with high accuracy and resolution.
For those seeking freedom in their prototyping endeavors, it is crucial to have access to reliable testing equipment that helps ensure accurate measurements and efficient debugging processes. By investing in quality multimeters, oscilloscopes, and logic analyzers, inventors and designers can confidently explore new ideas without compromising on precision or accuracy.
Effective Debugging Techniques for Prototypes
Effective debugging techniques are crucial in the process of developing prototypes, as they help identify and resolve issues to ensure the prototype functions correctly. Debugging is a systematic approach to finding and fixing errors or bugs in software or hardware.
Here are three effective debugging techniques for prototyping:
Dividing and Conquering: This technique involves breaking down the problem into smaller parts, isolating the issue, and then narrowing down the search area. By focusing on specific sections of code or components, it becomes easier to identify and fix bugs.
Logging and Monitoring: Implementing logging mechanisms and monitoring tools allows developers to track the execution flow, capture error messages, and analyze program behavior in real-time. This data can provide valuable insights into potential issues.
Unit Testing: Writing unit tests for individual components helps identify bugs early on by systematically testing each part of the prototype's functionality. Running these tests regularly ensures that any new changes do not introduce regressions.
Tips for Successfully Going From Idea to Working Prototype
Successfully going from idea to working prototype requires a systematic approach that incorporates idea validation techniques and an iterative prototyping process.
Idea validation techniques involve analyzing the feasibility, market potential, and customer demand for the proposed solution.
The iterative prototyping process involves creating multiple versions of the prototype, gathering feedback, and making improvements based on user insights.
Idea Validation Techniques
To ensure the viability of an idea, it is essential to employ various validation techniques when moving from concept to a working prototype. These techniques help determine if the idea has potential and can be successfully implemented.
Here are three key idea validation techniques:
Market Research: Conduct thorough market research to understand customer needs, preferences, and existing solutions. This helps identify gaps in the market that your idea can fill.
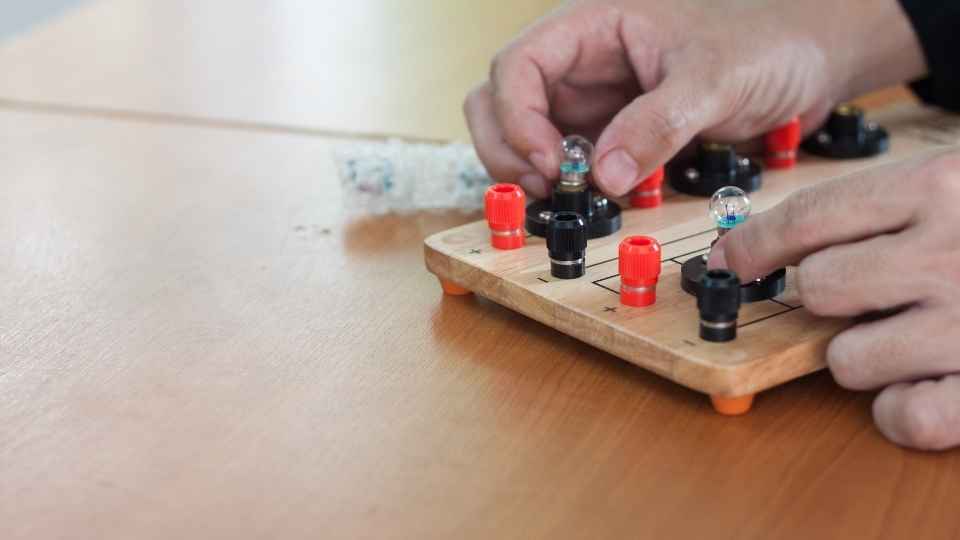
Proof of Concept: Create a proof of concept to test the feasibility of your idea. This involves building a basic prototype or conducting experiments to validate key assumptions.
User Testing: Engage with potential users by conducting user testing sessions. Gather feedback on your prototype's usability, functionality, and overall appeal to refine and improve it.
Iterative Prototyping Process
In the iterative prototyping process, designers create multiple versions of a prototype with the goal of refining and improving the product. This approach allows for freedom in exploring different ideas and making incremental changes based on user feedback.
The process begins with designing a basic prototype that represents the core functionality of the product. This initial version is then tested and evaluated by users to gather valuable insights. Based on this feedback, designers make necessary modifications to enhance usability, features, and overall user experience.
These iterations continue until a final version is achieved that meets all requirements and satisfies user needs. The iterative prototyping process provides flexibility in adapting to changing requirements and ensures continuous improvement throughout the development cycle.
Frequently Asked Questions
What Are the Common Challenges Faced During the Prototyping Process?
Common challenges faced during the prototyping process include lack of clarity in requirements, difficulty in translating ideas into tangible prototypes, limited resources and time constraints, and the need for continuous iteration and refinement.
Can You Provide Examples of Industries That Extensively Use Breadboarding Techniques in Their Prototyping Process?
Examples of industries that extensively use breadboarding techniques in their prototyping process include electronics, automotive, aerospace, and consumer goods. Breadboarding allows for quick iterations and testing of ideas before committing to costly production processes.

What Are the Advantages and Disadvantages of Using Solderless Prototyping Methods?
When considering the advantages and disadvantages of using solderless prototyping methods, it is important to evaluate factors such as ease of use, flexibility, cost-effectiveness, potential for errors, and limitations in terms of complexity and durability.
How Has Rapid Prototyping, Such as 3D Printing and Laser Cutting, Revolutionized the Product Development Cycle?
Rapid prototyping, such as 3D printing and laser cutting, has revolutionized the product development cycle by enabling faster iteration and reducing time-to-market. These techniques have brought about a paradigm shift in how prototypes are created, allowing for greater design freedom and precision.
Are There Any Specific Testing Equipment That Are Essential for Prototyping, but Often Overlooked?
There are several testing equipment that are essential for prototyping, but often overlooked. These include force gauges, temperature sensors, vibration analyzers, and torque meters. Properly utilizing these tools ensures accurate evaluation of prototype performance and reliability.
 Basic Electronics ConceptsEssential ToolsCircuit Design BasicsMicrocontrollersDIY Electronics ProjectsRoboticsPrivacy PolicyTerms And Conditions