
Imagine being able to design and build your own electronic devices right from the comfort of your own home. With a well-equipped DIY electronic workshop, this dream can become a reality.
In this comprehensive guide, we will walk you through the process of setting up your very own workspace tailored specifically for electronics projects. From planning your space to organizing components and ensuring safety, we will provide you with all the tools and knowledge you need to create an efficient and productive environment for your DIY endeavors.
Key Takeaways
- Consider factors such as size, layout, and accessibility when planning and setting up your electronic workshop space.
- Ensure comfortable movement and minimize the risk of accidents in your workshop.
- Group similar items together and organize them logically to keep your workspace clutter-free.
- Use essential tools such as a soldering iron, multimeter, wire strippers, and oscilloscope to enhance productivity and tackle any project with ease.
Planning Your Electronic Workshop Space
When planning your electronic workshop space, it is crucial to consider factors such as size, layout, and accessibility in order to create an organized and efficient working environment.
The size of your workshop should be sufficient to accommodate all necessary equipment and allow for comfortable movement. A well-thought-out layout is essential to ensure easy access to tools and components while minimizing the risk of accidents or damage. Consider grouping similar items together and organizing them in a logical manner.
Accessibility is also important, as you want to have everything within reach without cluttering your workspace unnecessarily. By carefully considering these factors when planning your electronic workshop space, you can create an environment that promotes productivity and enables you to work freely on your DIY projects.
Now that we have discussed the importance of planning your electronic workshop space, let's move on to exploring the essential tools you will need for DIY electronics work.
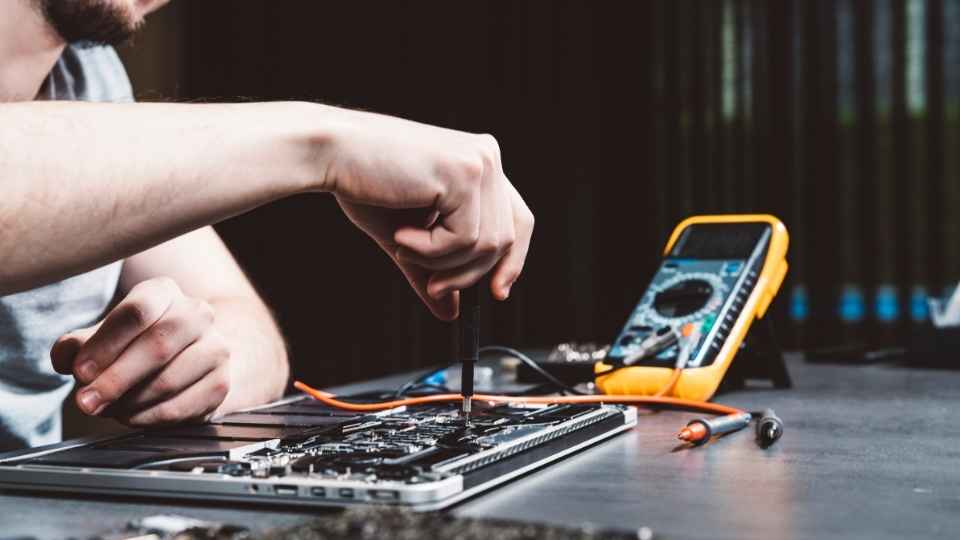
To effectively work on electronics projects, it is crucial to have a set of essential tools at your disposal. These tools will not only enhance your productivity but also ensure that you can tackle any project with ease. Here are four must-have tools for your DIY electronic workshop:

Soldering Iron: This tool is essential for joining components together and making electrical connections.
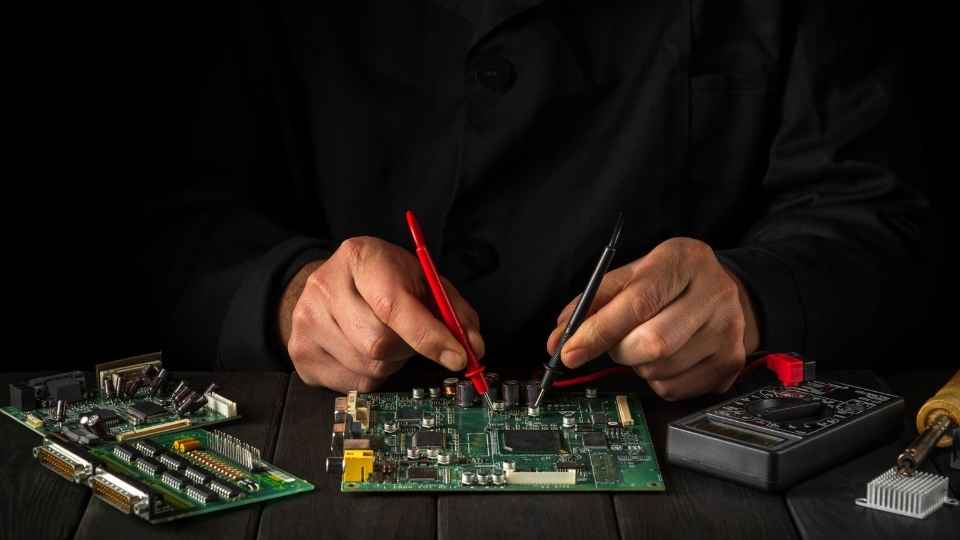
Multimeter: A multimeter allows you to measure voltage, current, and resistance, helping you troubleshoot and test circuits.
Wire Strippers: These specialized pliers make it easy to strip insulation from wires without damaging the conductor.
Oscilloscope: An oscilloscope displays real-time waveforms, enabling you to analyze signals and diagnose circuit issues.
With these essential tools in your arsenal, you'll have the freedom to explore the world of electronics and bring your DIY projects to life.
Setting up a Workbench for Electronics Projects
When it comes to setting up a workbench for electronics projects, there are several key factors to consider.
An ergonomic design is crucial to ensure comfort and efficiency during long hours of work.
Additionally, proper lighting is essential for optimal visibility and accuracy when working with intricate components.
Ergonomic Workbench Design
Designing an ergonomic workbench is essential for creating a comfortable and efficient workspace in your DIY electronic workshop. To ensure maximum productivity and minimize the risk of strain or injury, consider the following elements when designing your workbench:
Adjustable Height: A workbench with height adjustability allows you to customize it according to your preference, ensuring proper posture and reducing the strain on your back and neck.
Ample Surface Area: A spacious work surface provides enough room for all your tools, components, and equipment, allowing you to keep everything organized and within reach.
Ergonomic Chair: Pairing your workbench with an ergonomic chair that provides proper lumbar support will enhance comfort during long hours of tinkering.
Cable Management: Incorporating cable management solutions such as cable trays or clips will help keep wires organized and prevent tripping hazards.
By considering these aspects when designing your ergonomic workbench, you can create an optimal environment for productive DIY electronics projects.
Now let's explore another important aspect of setting up a DIY electronic workshop - proper lighting for projects.
Proper Lighting for Projects
Proper lighting is crucial in a DIY electronic workshop as it ensures clear visibility of small components and prevents eye strain during intricate projects. When working with delicate electronic components, precision is key, and adequate lighting plays a vital role in achieving accurate results.
LED strip lights or adjustable desk lamps are recommended for illuminating the work area. Positioning the light source at an angle that minimizes shadows will enhance visibility while soldering or assembling circuit boards.
Additionally, considering the color temperature of the lighting is important. A cool white light (around 5000K) provides a clearer view of details and reduces eye fatigue compared to warm yellow lighting.
Ultimately, investing in proper lighting solutions will promote efficiency and comfort in your DIY electronic workshop, allowing you to carry out intricate projects with ease and freedom.
Organizing and Storing Electronics Components
To ensure efficient workflow and easy access, it is crucial to establish a well-organized system for storing and categorizing electronics components in your DIY electronic workshop.
Use clear plastic storage bins with dividers to separate different types of components such as resistors, capacitors, and ICs.
Label each bin clearly with the component type and value for quick identification.
Utilize small drawers or cabinets to store smaller components like screws, nuts, and washers.
Consider using a pegboard or wall-mounted organizer for larger tools such as soldering irons, wire cutters, and pliers.
Having an organized system not only saves time but also reduces frustration when searching for specific components during a project. It allows you to easily locate what you need and ensures that everything is kept in its proper place.
Creating a Soldering Station for Your Workshop
When it comes to creating a soldering station for your workshop, there are a few key components that you will need.
First and foremost, you will need a soldering iron with adjustable temperature control to ensure precise and accurate soldering.
Additionally, investing in a soldering stand or holder is essential for safety and convenience. It will keep the hot iron securely in place when not in use.

Furthermore, having a good quality soldering iron tip cleaner is vital as it helps maintain the tip's performance by removing oxidation and excess solder.
A reliable fume extractor or ventilation system is also recommended to protect your health by minimizing exposure to potentially harmful fumes.
By setting up an efficient and well-equipped soldering station, you'll be able to work on projects with ease and confidence.
Now let's move on to the next section where we discuss power supply and testing equipment for your workshop.
Power Supply and Testing Equipment for Your Workshop
Having a stable and reliable power supply is crucial for any workshop, ensuring that your electronic projects are powered efficiently and without interruption. To achieve this, it is important to have the right equipment in place. Here are four essential items for powering and testing your DIY electronic workshop:
Variable Power Supply: A variable power supply allows you to adjust the voltage and current output, providing flexibility for different projects.
Bench Power Supply: A bench power supply provides a fixed voltage output and is ideal for powering specific components or modules.

Multimeter: A multimeter is an essential tool for measuring voltage, current, resistance, and continuity in your circuits.
Oscilloscope: An oscilloscope enables you to visualize waveforms and troubleshoot circuit issues by capturing and analyzing electrical signals.
By equipping your workshop with these tools, you can ensure that you have the necessary power supply options and testing capabilities to tackle any project.
Now let's explore how to ensure safety in your DIY electronic workshop.
Ensuring Safety in Your DIY Electronic Workshop
Safety is of utmost importance in a DIY electronic workshop. Implementing proper precautions and procedures is essential to protect yourself and your equipment.
When working with electronics, it is crucial to prioritize safety measures to prevent accidents or damage. First and foremost, ensure that your workspace is well-ventilated to avoid inhaling harmful fumes.
Additionally, always wear appropriate personal protective equipment such as safety goggles and gloves to shield yourself from potential hazards like sparks or chemicals.

It is also vital to have a fire extinguisher readily available in case of emergencies. Furthermore, use insulated tools when handling live circuits to minimize the risk of electric shock.
Lastly, organize your work area by keeping it clean and clutter-free, reducing the chances of tripping over wires or causing accidental short circuits.
Frequently Asked Questions
Can I Use a Regular Desk or Table as My Workbench for Electronics Projects?
Yes, a regular desk or table can be used as a workbench for electronics projects. However, it is recommended to have a dedicated workspace that includes features like built-in power outlets and storage options for equipment and components.
How Do I Properly Dispose of Electronic Waste and Old Components?
Proper disposal of electronic waste and old components is essential for environmental preservation. Utilize designated e-waste recycling centers or contact local authorities to inquire about specific regulations for your region.
What Are Some Essential Safety Precautions to Take When Working With Electronics?
When working with electronics, it is essential to prioritize safety. This includes wearing protective gear, such as gloves and goggles, using proper tools and equipment, ensuring a well-ventilated workspace, and following electrical safety protocols to prevent accidents or injuries.
Are There Any Specific Guidelines for Organizing and Labeling Electronic Components?
When organizing and labeling electronic components, it is important to maintain a systematic approach. This involves categorizing components based on their type and function, using clear labels that include pertinent information for easy identification and retrieval during future projects.
Do I Need a Dedicated Power Supply for My Workshop or Can I Use a Regular Outlet?
A dedicated power supply is recommended for a DIY electronic workshop to ensure stable and regulated voltage, especially when working with sensitive components. It provides a reliable source of power and reduces the risk of equipment damage or failure.

 Basic Electronics ConceptsEssential ToolsCircuit Design BasicsMicrocontrollersDIY Electronics ProjectsRoboticsPrivacy PolicyTerms And Conditions